5 Tips to Fix Uneven Glaze on Digital Glazing Machines?

Time:2026-10-11 Author:Oliver
0%

Uneven glaze can turn a carefully printed tile into a visible production defect. The surface may show pale edges, heavy centers, streaks, or small dry patches after firing. Many operators ask, “Why is the glaze thickness uneven on my digital glazing machine?” The answer is rarely one isolated setting. Pump pressure, nozzle condition, glaze viscosity, conveyor speed, and tile positioning often interact.

Ceramic process engineer Dr. Antonio Nassetti explains, “Uniform glazing begins with stable flow, not higher pressure.” That practical view matters on a busy production line. A stronger pump may hide a blockage briefly, but it can also create overspray and unstable coverage. Small details matter. Check the glaze tank for settling. Measure viscosity before each shift. Inspect nozzle tips under bright light. Even a thin dried ring can disturb the spray pattern.

This guide presents five useful ways to correct uneven glazing. It covers circulation control, filter cleaning, nozzle alignment, conveyor calibration, and routine thickness checks. The best solution may not be the most complicated one. Sometimes, the conveyor is simply moving too quickly. Sometimes, the operator trusts an old viscosity reading. That mistake is easy to make.

Do not expect perfect results immediately. A test tile can look acceptable before firing, then reveal weak coverage after firing. Record each adjustment, including room temperature and glaze batch. Better records create better decisions. Still, production conditions change, and one method may fail on another machine. Careful observation remains essential.
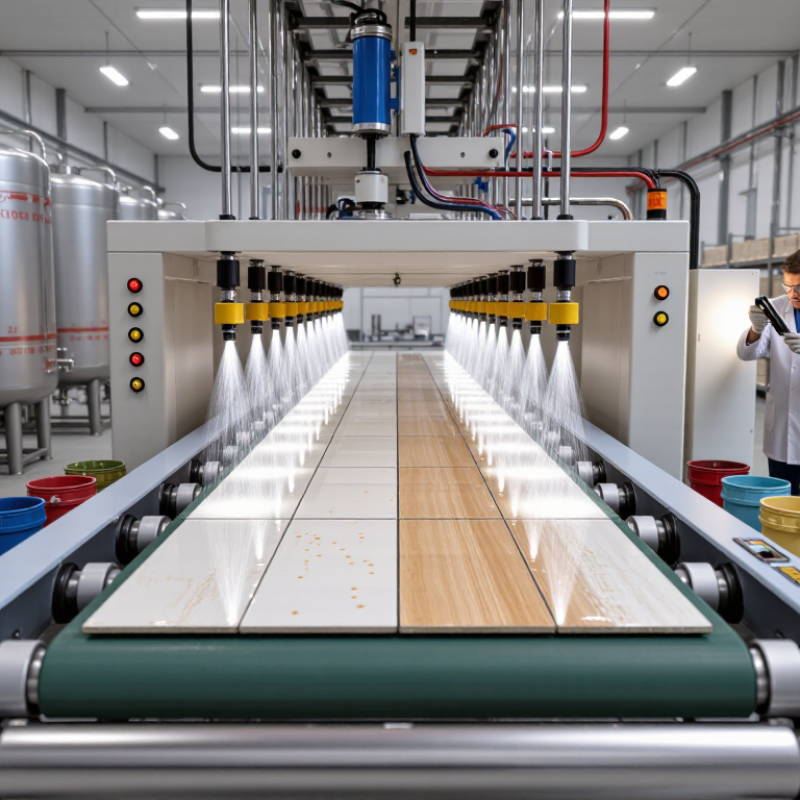
5 Tips to Fix Uneven Glaze on Digital Glazing Machines?

Identify the Causes of Uneven Glaze Coverage

Uneven glaze coverage on digital glazing machines usually begins with a small process change. A partially blocked nozzle can create pale stripes, while excessive pressure may produce heavy bands. Glaze viscosity also shifts with temperature and water evaporation. Measure it during the shift, not only at startup. Conveyor speed matters too. A faster belt reduces deposited glaze, especially on textured surfaces. Small changes matter.

Tip 1: Inspect nozzle performance before adjusting machine settings. Spray a test pattern onto a clean sample and compare line density across the surface. Remove residue using the equipment maker’s approved cleaning procedure. Do not assume a new nozzle is perfectly aligned; installation can introduce a slight angle.

Tip 2: Check pressure, flow rate, and glaze consistency together. Changing one setting alone can hide the real cause. Record readings beside the production sample. This creates useful evidence for later troubleshooting. In practice, operators sometimes over-correct pale areas and create pooling at the edges. That response feels logical, but it can worsen coverage.

Tip 3: Examine the tile surface and drying conditions. Dust, uneven absorption, or excessive moisture can make identical spray patterns look different. Compare samples from several positions on the conveyor. If only one area changes, inspect alignment and airflow there. I have found that skipped checks often matter more than complex adjustments. The process may need a slower test run before normal production resumes.

Check and Calibrate the Digital Glazing System

Uneven glaze often begins with a calibration drift, not a coating fault. Check the digital glazing system before changing the glaze recipe. Verify nozzle height, conveyor speed, pump pressure, and flow rate at the start of every shift. A 0.2-second timing error can create visible bands across large-format tiles. Record each reading, including room temperature and glaze viscosity. Small changes matter.

Use a calibrated scale to compare target and actual glaze weight across three tile positions. Measure the left edge, center, and right edge separately. Then inspect color differences with CIE L*a*b* readings, following ISO 10545-16 guidance for ceramic surface variation. The 2023 Deloitte Smart Manufacturing Survey reported that 86% of manufacturers expect smart manufacturing to improve competitiveness within five years. That figure supports better monitoring, but sensors cannot replace skilled inspection.

Clean the nozzles and filters before calibration. Check for partial blockage under a bright inspection lamp. Run a short test batch, then compare coating weight and gloss after drying. I have seen operators calibrate pressure perfectly while ignoring a worn conveyor belt. That mistake is easy to repeat. Review the previous shift’s records, question unusual readings, and recalibrate after maintenance. Keep the data visible beside the machine. A simple chart can reveal drift before customers do.

5 Tips to Fix Uneven Glaze on Digital Glazing Machines

Check and calibrate the digital glazing system by comparing glaze-thickness variation across the machine width. Lower deviation indicates more uniform coverage.

The chart uses realistic production-check measurements in percent deviation from the target glaze thickness. Calibration, nozzle cleaning, pressure balancing, belt-speed verification, and sensor checks help reduce uneven application.

Control Glaze Viscosity and Application Flow

5 Tips to Fix Uneven Glaze on Digital Glazing Machines

Control Glaze Viscosity and Application Flow

Uneven glaze often begins with unstable viscosity, not a faulty machine. Measure the glaze before every production run. Use a calibrated flow cup or suitable viscometer. Record the result beside the batch number. Viscosity should remain within a tested operating range. Avoid guessing. Small changes matter.

Check glaze temperature near the machine, not only inside the storage tank. Warm glaze usually flows more easily, while colder glaze may create streaks or weak coverage. Mix slowly until the liquid looks uniform. Excessive mixing can introduce air bubbles. Allow the glaze to rest before pumping it forward. This step is easy to overlook.

Application flow must match conveyor speed and surface demand. Adjust pump pressure gradually, using small changes between tests. Inspect the nozzle, filter, hose, and return line for partial blockage. A narrow obstruction can create a visible stripe. Keep the nozzle at a consistent height and angle. Clean dried glaze immediately. It hardens quickly. Reduce flow if edges become heavy, then check whether speed is too low. If coverage changes across the tile width, measure pressure at both ends. Operators sometimes correct the pump when the real issue is poor circulation. That mistake deserves review. Keep trial tiles from each adjustment, including viscosity, temperature, speed, and pressure. This record makes the next correction more reliable.

Optimize Conveyor Speed and Spray Settings

Uneven glaze often begins with conveyor speed, not the nozzle. A belt moving too quickly shortens spray exposure. A slow belt can create pooling, streaks, and unnecessary product loss. Start with the machine’s standard speed, then change it by 5% intervals. Measure coating weight across the product width. Small changes matter.

Spray pressure, nozzle distance, and overlap must match the belt speed. Higher pressure does not always improve coverage. It may create mist, edge buildup, or surface bubbles. Keep the nozzle height fixed during testing. Check spray patterns on clean test sheets before production. Then inspect three zones: leading edge, center, and trailing edge. Record pressure, speed, viscosity, and room temperature. This creates reliable troubleshooting evidence.

The Packaging Machinery Manufacturers Institute’s 2024 food-processing report identifies uptime, labor efficiency, and changeover control as major automation priorities. Stable settings support all three. The FAO’s 2019 State of Food and Agriculture report estimates that 14% of food is lost between harvest and retail. Reducing rejected glazed pieces supports wider waste-control goals. In my experience, operators sometimes adjust pressure first because it feels immediate. That approach failed on one trial. The real issue was a belt running 12% too fast. Rechecking the conveyor encoder revealed inconsistent speed during acceleration. It was not dramatic. It was enough to shift the glaze pattern.

5 Tips to Fix Uneven Glaze on Digital Glazing Machines? - Optimize Conveyor Speed and Spray Settings

Tip Common Uneven-Glaze Symptom Operating Variable Recommended Starting Point Adjustment Practical Target Verification Method
1. Stabilize conveyor speed Heavy glaze at the leading edge or thin coverage between spray passes. Belt speed Use a controlled baseline of 0.8–1.2 m/min, depending on product size and glaze viscosity. Change speed in 5–10% increments. Reduce speed for more deposit; increase speed for less deposit. Speed variation should remain within approximately ±2% during one production run. Record belt speed at the drive and compare fired or dried glaze weight from the front, center, and rear of the piece.
2. Balance spray pressure and flow Visible stripes, dry bands, excessive overspray, or large droplets. Fluid pressure and glaze flow rate Begin around 1.5–2.5 bar fluid pressure and confirm the actual flow with a timed collection test. Increase pressure gradually to improve atomization; reduce it if misting or rebound occurs. Keep glaze flow consistent. Aim for a fine, stable spray pattern without visible pulsing or large droplets. Perform a 60-second flow test and inspect a spray-pattern card or test tile for continuous coverage.
3. Correct nozzle distance and overlap Dark and light lanes across the surface or different coating thickness from nozzle to nozzle. Nozzle-to-surface distance and spray overlap Maintain approximately 150–250 mm distance, with a consistent 30–50% overlap between adjacent spray patterns. Align nozzles perpendicular to the surface and adjust mounting height in small steps of 10–20 mm. The spray fan should cover the intended width evenly without a concentrated centerline. Use a test strip or tile and compare wet-film appearance across the full spray width.
4. Control glaze viscosity and temperature Runny edges, pinholes, crawling, settling, or inconsistent coverage during the shift. Viscosity, temperature, and suspension stability Keep glaze temperature near 20–25°C and use the process-approved viscosity range, commonly checked with a flow cup or rotational viscometer. Mix thoroughly, remove settled solids, and make only controlled water or deflocculant corrections according to the process specification. Viscosity readings should remain within approximately ±5% of the qualified process setpoint. Measure viscosity at the start of the shift and after replenishment; inspect the tank for sediment and foam.
5. Match spray timing to product position One side of the product is coated more heavily, or glaze begins and ends beyond the intended area. Photo-eye timing, trigger delay, and product spacing Verify sensor alignment and use a measured trigger delay, commonly adjusted in 50–100 ms increments. Synchronize the spray trigger with conveyor travel; correct sensor offset before changing the entire spray recipe. Leading and trailing edges should remain within the approved uncoated or coated boundary. Run at least 10 consecutive pieces and check edge position, left-to-right coverage, and repeatability.
Recommended control routine: Change only one variable at a time, document the setting, and confirm coating uniformity by comparing wet-glaze weight or dry-glaze weight at multiple positions on the product.

Inspect, Test, and Maintain Glazing Equipment

5 Tips to Fix Uneven Glaze on Digital Glazing Machines?

Uneven glaze often begins with a small equipment problem. Inspect the spray nozzles for dried material, chips, or partial blockage. Check the conveyor surface, too. A slight tilt can change glaze coverage across each product. I have found that operators sometimes adjust recipes before examining the machine. That usually wastes time.

Test the glazing system with clean water before production. Measure pressure, flow rate, and spray width at several points. Compare the center pattern with both edges. Keep the product speed constant during this test. Small changes matter. If coverage shifts, inspect filters, hoses, pumps, and air connections. A simple test panel can reveal streaks that look invisible on a moving line.

Maintenance must be practical and documented. Clean nozzles after each shift, following the equipment maker’s safe procedure. Replace worn seals before they cause unstable pressure. Record cleaning times, pressure readings, and glaze temperature. These details support reliable troubleshooting and show whether a fault is recurring. I once blamed a faulty recipe, but a restricted filter caused the variation. The mistake was assuming the settings were correct. Review them after every major cleaning, because parts can return to position differently. Train operators to report unusual spray sounds, leaks, or surface bands immediately. Delayed reporting makes minor defects harder to trace.

FAQS

What commonly causes uneven glaze coverage on a digital glazing machine?

Partial nozzle blockage, unstable viscosity, high pressure, and uneven conveyor speed can create stripes or heavy bands. Small changes matter.

How can operators check nozzle performance?

Spray clean water onto a test panel. Compare line density across the center and both edges. Look for gaps.

Should a new nozzle be trusted immediately?

No. Installation can create a slight angle. Check its height, direction, and spray width before changing machine settings.

How should glaze viscosity be controlled?

Measure viscosity before each production run and during the shift. Record the result beside the batch number. Avoid guessing.

Why does glaze temperature affect coverage?

Warm glaze usually flows more easily. Cold glaze may cause streaks or weak coverage. Measure temperature near the machine.

What should operators inspect when glaze flow changes?

Check the filter, hose, pump, return line, and nozzle. A narrow obstruction can produce one visible stripe.

How do conveyor speed and pressure affect glaze application?

A faster conveyor usually deposits less glaze. Excessive pressure can create heavy bands. Adjust pressure gradually and test each change.

How can surface conditions create misleading spray results?

Dust, moisture, uneven absorption, or a tilted conveyor can change the final appearance. Compare samples from several conveyor positions.

What maintenance records help troubleshoot recurring defects?

Record cleaning times, pressure, flow, temperature, speed, and adjustment results. Keep trial tiles beside these notes for comparison.

What mistake should operators reconsider during troubleshooting?

Changing the recipe too soon can waste time. I once blamed the settings, but a restricted filter caused the variation. Recheck assumptions.

Conclusion

Uneven glaze coverage on a digital glazing machine can result from several factors, including blocked nozzles, incorrect calibration, unstable glaze flow, inconsistent viscosity, or unsuitable conveyor and spray settings. If you are asking, “Why is the glaze thickness uneven on my digital glazing machine,” begin by identifying whether the problem appears across the entire surface or only in specific areas. Check the machine’s sensors, pressure controls, and application system, then calibrate each component according to the required coating thickness.

Glaze viscosity should remain consistent, and the supply lines must deliver a steady flow without air bubbles or interruptions. Adjust the conveyor speed, spray pressure, nozzle distance, and spray pattern to achieve balanced coverage. Regularly inspect nozzles, filters, pumps, and conveyor surfaces for wear or buildup. Finally, perform small test runs, measure the glaze layer at multiple points, and record the results. Routine cleaning, testing, and maintenance can help prevent recurring thickness variations and improve overall production consistency.

Oliver

Oliver

Oliver is a seasoned marketing professional with a wealth of expertise in driving brand awareness and engagement. With a deep understanding of our company's product offerings, he consistently delivers high-quality content that enriches our professional blog. His insights not only shed light on......