China Top 10 Fabrics How to Prepare for Pigment Printing?

Time:2026-10-01 Author:Henry
0%

Preparing fabric for pigment printing requires more than choosing an attractive surface. Each fabric reacts differently to ink, heat, moisture, and pressure. Cotton may absorb pigment evenly, while polyester can resist penetration and show weaker color depth. Linen often reveals natural slubs, creating character but also uneven edges. Blended fabrics can be less predictable. Small details matter.

This guide explores China’s top 10 fabrics and explains How to prepare fabrics for digital pigment printing. The process usually includes inspection, scouring, drying, conditioning, and careful surface treatment. Dust, oil, sizing agents, and excessive moisture can reduce adhesion. A clean, stable fabric gives the printhead a better working surface. It also improves color consistency during curing. Experienced printers normally test a small fabric swatch before approving bulk production. Test before production.

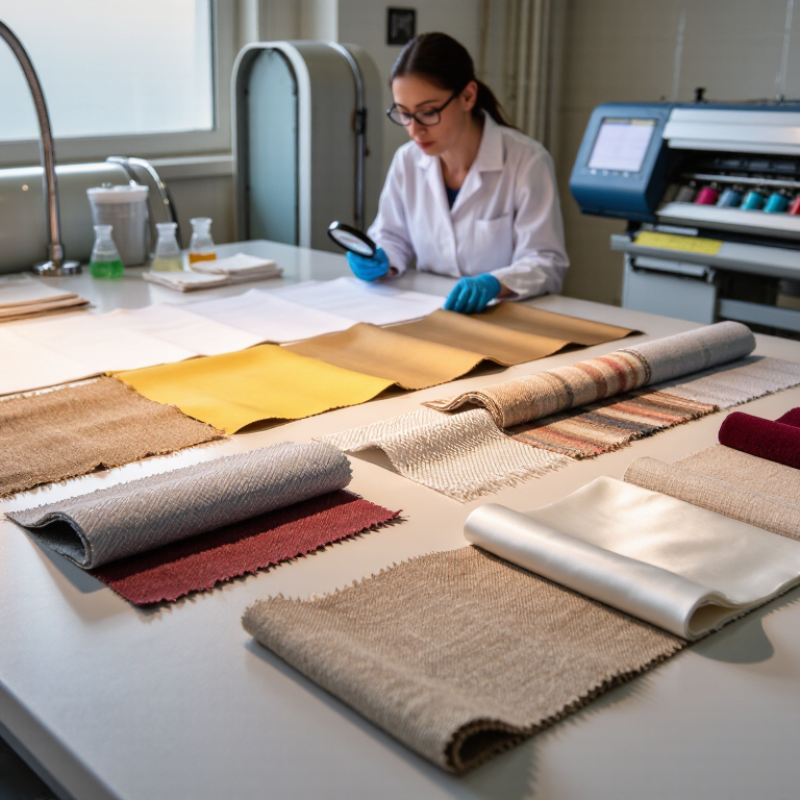
Fabric weight, weave density, and fiber content should guide every preparation decision. A tightly woven fabric may need different pretreatment from an open, textured fabric. Excessive pretreatment can stiffen the handle or dull the fabric’s natural appearance. Too little preparation may cause fading, bleeding, or patchy coverage. Results can vary. Even reliable procedures need adjustment for climate, machinery, and ink formulation. I have found that a simple inspection under strong side lighting can reveal lint, creases, and uneven tension before printing begins. It is an easy step, but it is often overlooked. This article offers practical guidance based on textile production principles, supplier specifications, and repeatable testing. Some recommendations may require refinement, because no single preparation method suits every fabric or printing system.
China Top 10 Fabrics How to Prepare for Pigment Printing?

Classify China’s Top 10 Fabrics by Fiber Content and Printability

China’s top ten fabrics can be grouped by fiber content and pigment-printing behavior. Textile Exchange’s Materials Market Report 2024 estimates polyester held about 57% of global fiber production in 2023. Cotton followed as a major natural fiber. The ten practical categories are cotton, linen, hemp, viscose, modal, lyocell, polyester, nylon, acrylic, and wool.

Cotton, linen, hemp, viscose, modal, and lyocell are cellulose-rich fabrics. They usually accept pigment prints well after scouring and controlled drying. Cotton gives the most dependable color depth. Linen and hemp create a textured, slightly uneven image. That texture can be attractive. It can also expose weak registration. Viscose, modal, and lyocell need gentle tension control because their surfaces may fibrillate.

Wool is protein-based and requires lower curing stress. Heat can damage its handle.

Polyester, nylon, and acrylic are synthetic fibers. Polyester often needs a suitable binder and migration-resistant curing process. Nylon can print clearly, but excessive heat may distort lightweight structures. Acrylic is less common in apparel printing and may show uneven adhesion.

The Future Market Insights report on textile printing identifies pigment systems as a growing segment, partly because they reduce water use compared with many wet dyeing routes. Still, lower water use does not guarantee a better print. Operators should test crocking, wash durability, hand feel, and shade variation using AATCC or ISO methods. My practical mistake was trusting a bright first strike. The washed sample told the truth.

Test Absorbency, pH 6–8, and Moisture Below 8% Before Printing

Preparing the top ten fabrics for pigment printing starts with simple, measurable checks. Cotton, linen, rayon, polyester, and blended materials can react differently.

Absorbency should be tested on several fabric areas, not just one corner. Place a small water drop on the surface. It should spread evenly without sitting too long or disappearing instantly.

Uneven wetting may cause patchy color and weak print definition.

Fabric pH should remain between 6 and 8 before printing. A mild, balanced surface supports more stable binder performance. Use a calibrated pH strip or meter after fabric conditioning.

Moisture should stay below 8%. Excess water can dilute the print paste and change drying behavior. A moisture meter gives faster guidance, but readings should be checked in multiple layers. One reading can mislead.

Tips: Keep test records for each fabric lot. Store rolls away from steam, leaks, and direct floor contact. Let conditioned fabric rest before testing again. The 8% target is useful, but it is not magic. Heavy fabrics may dry unevenly, while lightweight blends can change quickly. If absorbency, pH, or moisture falls outside range, adjust the preparation process before printing. Rushing this step often creates defects that appear only after curing. That is an expensive lesson.

Select Pigment Binders at 5–15% of Paste Weight for Each Fabric

Preparing pigment printing for China’s top fabric categories starts with the binder, not the screen. Cotton, polyester, viscose, linen, nylon, acrylic, wool blends, rayon, denim, and mixed fabrics react differently. A practical working range is 5–15% binder based on total paste weight. Do not calculate it from fabric weight. That mistake can weaken adhesion and distort the recipe.

For cotton and linen, begin around 8–10% when the fabric has good absorbency. Viscose may need careful control because excessive binder can reduce its soft drape. Polyester and nylon often require 10–15%, especially when smooth fibers resist pigment attachment. Denim can tolerate a stronger film, but too much binder may create a stiff surface. Blended fabrics need small trials near 7–12%, since each fiber affects drying and rubbing performance.

Use a 100-gram paste trial. Add 8 grams of binder for an 8% starting formula, then print a small fabric panel. Cure under the selected temperature and time, following the binder supplier’s technical data. Check dry rubbing, wet rubbing, washing, cracking, and hand feel after 24 hours. The color looked acceptable in one trial, but the fabric became harsh after curing. That result changed the formula. Lower binder content, adjusted pigment loading, or a softer curing profile may work better. Record every result. Small variations in moisture, fabric preparation, and paste viscosity can change production performance.

Recommended starting binder levels for pigment printing are shown as a percentage of total print-paste weight. Cellulosic and absorbent fabrics generally require slightly higher binder levels, while smooth synthetic fabrics often start lower. Actual results should be confirmed through laboratory trials because pigment type, fabric construction, curing temperature, and fastness requirements affect the final dosage.

Optimize Curing at 150–170°C for 2–3 Minutes to Fix Pigments

China’s top ten fabric categories often include cotton, linen, rayon, polyester, nylon, denim, canvas, fleece, jersey, and blended fabrics. Each reacts differently during pigment printing. Prewash the fabric when possible, then remove loose fibers, oil, and dust. A clean, dry surface helps the pigment binder form an even film.

Curing is the critical step. Set the oven or heat press between 150 and 170°C for 2–3 minutes. Use a calibrated thermometer, not only the machine display. The fabric must reach the target temperature throughout the printed area. Too little heat can cause weak rubbing fastness and powdery surfaces. Excessive heat may yellow pale fabrics, flatten texture, or shrink unstable blends. I once trusted the programmed setting without checking the fabric temperature. The print looked fine, but washing exposed poor fixation. That shortcut was a useful warning.

Tips: Test a small swatch first. Record temperature, time, fabric weight, and binder ratio. Check dry and wet rubbing after curing. For thick fleece or canvas, allow extra heat penetration rather than adding random time. Polyester and heat-sensitive blends need cautious trials. Keep the print surface clean before stacking. Slight unevenness may remain, especially on textured fabrics, so inspect under normal lighting. Results can vary between production lots. Retest when the fabric, moisture level, or pigment depth changes.

Verify Wash Fastness at Grade 3–4 and Color Difference Below ΔE 1.0

Pigment printing can work on cotton, linen, denim, rayon, polyester, nylon, acrylic, wool blends, canvas, and stretch fabrics. Each fabric absorbs pigment differently. Surface texture also affects print sharpness and shade control. Before production, record the fabric construction, weight, moisture content, and pretreatment condition.

Wash fastness should reach Grade 3–4 under a consistent laboratory method. Test printed swatches after curing, not immediately after printing. Check color change and staining separately. A weak binder film may look attractive but fail after repeated washing. Use the same detergent, temperature, washing time, and drying method for every trial. Small details matter.

Color difference should remain below ΔE 1.0 against the approved standard. Measure several points across the printed area, including darker and lighter sections. Calibrate the spectrophotometer before testing. Keep lighting, viewing angle, and fabric conditioning consistent. In one trial, uneven curing caused a ΔE of 1.4, although the wet print looked correct. That result was disappointing. We adjusted curing time and binder dosage, but the second result still varied across the fabric width. More sampling was needed. Pigment printing often rewards patience more than speed.

FAQS

How much binder should be added to a pigment printing paste?

Use 5–15% of the total paste weight. Do not calculate binder from fabric weight. For a 100-gram paste, an 8% formula uses 8 grams of binder.

What binder level suits cotton and linen?

Begin around 8–10% when the fabric absorbs paste well. Test a small panel first. Absorbency can change between fabric lots.

Why do polyester and nylon often need more binder?

Their smooth fibers may resist pigment attachment. Start near 10–15%, then check rubbing, washing, stiffness, and surface coverage.

How should blended fabrics be tested?

Try approximately 7–12% binder. Each fiber affects drying, adhesion, drape, and rubbing performance. The first trial may not reveal every problem.

What curing conditions are recommended?

Use about 150–170°C for 2–3 minutes, following the technical data for the binder. Confirm fabric temperature with a calibrated thermometer.

What can happen when curing is insufficient?

The print may show weak rubbing fastness or a powdery surface. It can look acceptable initially. Washing may expose poor fixation.

Can excessive heat damage the printed fabric?

Yes. Pale fabrics may yellow, textures may flatten, and unstable blends may shrink. Heat-sensitive materials need cautious trials.

How should wash fastness be checked?

Test cured swatches using consistent detergent, temperature, washing time, and drying conditions. Check color change and staining separately. Grade 3–4 is the target.

What color difference should the printed fabric meet?

Keep the color difference below ΔE 1.0 against the approved standard. Measure several areas, including lighter and darker sections.

Why should production lots be retested?

Moisture, fabric preparation, paste viscosity, fabric weight, and curing can vary. A result from one lot may not repeat perfectly. Record every setting and result.

Conclusion

Preparing fabrics for pigment printing starts with understanding how fiber content affects absorbency, surface bonding, and print clarity. China’s top ten commonly used fabrics should be grouped by their fiber composition and printability before production begins. For reliable results, test absorbency, confirm fabric pH is between 6 and 8, and keep moisture below 8%. These checks help prevent uneven color, bleeding, and poor pigment adhesion. The keyword “How to prepare fabrics for digital pigment printing” reflects the importance of careful pretreatment and fabric-specific planning.

Next, choose a suitable pigment binder for each fabric and generally control its amount at 5–15% of the total paste weight. After printing, cure the fabric at 150–170°C for 2–3 minutes to fix the pigments without damaging the material. Finally, evaluate wash fastness, targeting Grade 3–4, and maintain color difference below ΔE 1.0 to ensure consistent quality.

Henry

Henry

Henry is a dedicated marketing professional with a profound expertise in the company's offerings. With years of experience in the industry, he possesses an impressive understanding of the market dynamics and consumer behaviors that drive success. Henry is committed to sharing his insights through......